Converting your classic Mustang 65-73 C4 Transmission to a AOD Overdrive
Converting a C4 TO AOD Transmission Swap
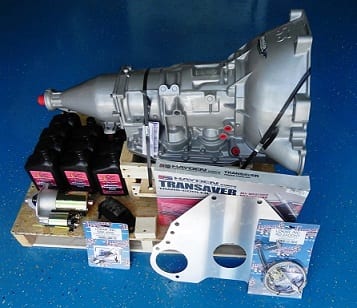
See our Stage 3 Billet Converter AOD Conversion Kit
The main reason for the transmission swap was to gain the benefits of the AOD’s 0.675:1 overdrive gear (lower cruise RPM and increased MPG). While this is essentially a bolt-in job, there are lots of little details that you should be aware of to make things go smoothly. These details, in no particular order, include:
Why its popular to swap from a C4 To an AOD is the close proximity in dimensions
C4 vs AOD Dimensions
Overall Length (bellhousing to tailshaft housing end, flat-to-flat):
AOD – 30 3/4″
C4 – 30 1/4″
Distance from Bellhousing to Insulator Mount (flat to mounting hole centerline): AOD – 21 3/4″ C4 – 19 3/4″
Torque Converter Stud Spacing (centerline-to-centerline) AOD/C4/164 teeth flexplate – 8 1/4″ between closest studs, 11 7/16″ between farthest studs (stud pattern diameter) C4/157 teeth flexplate – 7 3/4″ between closest studs, 10 5/8″ between farthest studs (stud pattern diameter)
C4 20 1/4″ 30 1/2″ C6 22 1/2″ 33 1/2″ AOD 22 1/4″ 30 3/4″ E4OD 29 3/8″ 37 1/2″
Flexplate Diameters 164 teeth – Most C4s had 157 teeth
Transmission Weights ( Approx)
AOD (without converter or fluid) – 150 lbs
AOD stock torque converter – 34 lbs
C4 (without converter or fluid) – 110 lbs
C4 torque converter – ? lbs C6 (without converter or fluid) – 140 lbs
Ford Transmission Ratios Comparison
     Stock  Stock  WR     Stock  WR     E4OD
     C4     C6     C6     AOD    AOD
1st  2.46   2.46   2.72   2.40   2.84   2.72
2nd  1.46   1.46   1.54   1.47   1.55   1.53
3rd  1.00   1.00   1.00   1.00   1.00   1.00
4th  ----   ----   ----   0.67   0.70   0.71
Notes:
– When comparing ratios from automatic and manual transmissions, the torque multiplication of the torque converter must also be considered.
– The AOD provides 60% lock-up in third gear and 100% lock-up in fourth gear (eliminates torque multiplication).
Balance Factor Information
1981-and-up 5.0L – 50.0 oz-in
Pre-1981 289/302 – 28.2 oz-in
351W and 351C-400 – 28.2 oz-in
( The Factory AOD Has some vulnarabilities – they are all addressed with This Stage 3 AOD We offer……..
See our Stage 3 Billet Converter AOD Conversion Kit
Horse Power: 500
(Up to 500 ft-lbs Torque)
Converter: 10” Custom Built Non-Damper Style
Stall: 2600-3200
Master Overhaul Kit with Alto Hardened Steels
Raybestos Stage I Frictions
Transgo Reprogramming Shift Kit with Shift Command
Filter
Complete Torrington Bearing Kit
New Bushing Kit
New Reverse Band
Alto Red Eagle Wide O.D. Band
300M Hardened Input Shaft
High Capacity 4 Plate Intermediate Clutch
Direct Clutch Pack (8 Frictions)
Rev. Drum w/ Heavy Duty Mechanical Diode
Updated Sun Shell and Gear
New Low Spring and Roller
High Capacity Pump Assembly
Expanded Capacity Overdrive Servo
Updated O.D. Servo Pin
Updated 3rd Accumulator Piston
Transmission Mount
Custom 360 degree Adjustable Shift Linkage Arm

General Notes on the AOD
Extension Housing
There are two tailshaft lengths used on AOD’s. The short model is the one that is closest to the C4 in overall length. Also, don’t confuse the AOD with the AOD-E, which has the rear mount located farther aft and uses an electronic valve body that requires a separate computer .
Converter Compatibility
The AOD transmission and torque converter are a matched pair. The AOD uses a hollow two piece input shaft (one shaft inside the other) for lock-up purposes and requires a specific torque converter. This arrangement is used to bypass the converter torque multiplication in higher gears (60% in third and 100% in overdrive) for better fuel economy. This is an attractive feature when using a high stall speed converter, since locking up the converter eliminates the excessive slippage (and attendant heat generation, RPM rise, and increased fuel consumption) associated with such converters. On the down-side, the input shaft is weaker than a similarly sized solid one piece design and you lose the torque multiplication effect.
Gear Ratios
The first three gears of the AOD and C4 are of similar ratio. We were looking for longer legs and increased fuel economy so we left our rear end gears alone. If better acceleration is the goal, a ring and pinion swap may be in order. The beauty of this swap is that the AOD’s 0.67:1 overdrive ratio can make a 3.73:1 ring and pinion act like a cruising 2.50:1 ratio. Come to think of it, we’ve got some extra 3.50:1 gears so maybe I can talk Dad into swapping them in one of these days.
Working with Aluminum
Like the C6 and C4, the AOD has an aluminum case so use a never-seize compound on the aluminum threads (e.g. bolting the insulator to the case). Also, when working with small aluminum threads (e.g. dropping the pan), I prefer a beam-type torque wrench so I can tell when I’m approaching the desired torque value. I don’t trust the click-type wrenches on the little stuff.
Transmission Tunnel Clearance
The AOD is beefier around the middle than the C4, so it uses up more space in the transmission tunnel. The 67-73 Mustangs were designed to swallow a C6, so there was no problem. It might be tight on cars with narrow tunnels (like 65-66 Mustangs), but they will fit.
Exhaust System Clearance
No problem here on our particular car (dual exhaust without a crossover). We could have installed the AOD without ever touching the exhaust, but we decided to unbolt the pipes from the exhaust manifolds for extra working room. This will vary from car to car so be prepared for potential exhaust work. When working with exhaust, it’s always a good idea to have a torch around to loosen old rusted-on bolts. Soaking in a rust penetrant is a good idea as well. Since I had the pipes unbolted from the manifolds, I took the opportunity to put in new exhaust donuts.
Transmission Crossmember and Insulator
The only bit of true fabricating that was required for this swap was the transmission mount crossmember. While the AOD and C4 overall lengths are within a half inch of each other, the mounting pad for the insulator on the AOD is 2 inches farther aft, so the crossmember mounting point needs to be moved an equal amount. Whether you need to buy or fabricate a custom cross member depends on the car you’re swapping the transmission into. On some full-sized cars, it’s supposed to be as easy as switching to a second set of aft mounting holes.
Flexplate Diameter and Balance
One of the more important parts of the swap is to choose the proper flexplate for your application. The integral bellhousing AOD requires a flexplate with 164 teeth (approximately 14 1/4″ diameter with an 11 7/16″ torque converter bolt pattern) for proper starter placement and converter compatibility. The C4, however, uses a detachable bellhousing that is matched to one of three different flexplate sizes (148, 157, and 164 teeth). The 157 teeth flexplates were generally used in 289/302 small and mid-sized cars, while the 164 teeth flexplates were used in 289/302 full-size cars and 351W/351C applications. The C4 164 teeth flexplates and the AOD 164 teeth flexplates will physically interchange, but there are two balance weights (pre-’81 302’s use a 28.2 oz-in balance weight, ’81-up 5.0’s are 50 oz-in), to be concerned with. All 351W’s and 351C’s use 28.2 oz-in balance factors.
Block Plate
A block plate (the thin stamped sheet metal plate that fits between the engine block and transmission housing) which matches the large AOD bellhousing is also required. This plate provides the correct starter location and engagement depth for the torque converter snout in the crank pilot (assuming you have the right flexplate). We used one from an early 289 full-size application (C4 with the large bellhousing).
Nuts and Bolts
The bosses on the AOD bellhousing are thicker than those of the C4, so longer bolts are required. We didn’t have enough of the proper length (2 1/8 to 2 1/4″ long bolts), so we cut down a few longer bolts to get the desired number of threads. Use a stiff piece of wire as a gauge to make sure they don’t bottom out. You can re-use the C4 torque converter nuts on the AOD converter but it’s a good idea to use new ones since they tend to round off. Also be aware that the AOD is a mixed standard transmission, despite what the METRIC embossed into the pan may imply. Some bolts are metric, others are not. Generally, the tranny internals are metric, but the places where the tranny connects to the car (insulator, hydraulic fittings, speedo-drive, etc.) are not.
Starter
The original starter was retained and aligned properly, in most cases.
Driveshaft and Yoke
The AOD is only a 1/2 inch longer than the C4.
Mechanical Interlocks
This required removing the TV/shifter shaft assembly from the AOD (involves dropping the pan and filter). Using the original C4 lever as a guide, we cut a spare lever and welded it on the shaft. This caused a problem since we were unable to remove the small circular grommet that seals the end of the concentric cylinders of the TV/shifter shaft assembly without damaging it. The C4 has a rubber O-ring in this area but the AOD uses a special formed piece which, like the flexplate, wasn’t easy to find over the holidays (“Sure we’ve got one but you’ll have to buy the $119 rebuild kit to get it”).
Shifter Operation
retained the C4 floor mounted shifter in the Mustang. Eyeballing the AOD and C4 shift levers maybe some slight variation.
Speedometer Gear
The speedometer driven gear assembly from the ’71, including bolt and retaining clip, slipped right into the AOD. you may have to change driven gears for proper calibration.
Electrical Connections
The AOD uses a four pin electrical connector for the reverse/backup lamps and neutral sensing switch. We didn’t get one with our tranny, so we soldered some wires on and used a liquid rubber compound to insulate. If you end up soldering, be careful not to melt the plastic housing that holds the pins in place.
Throttle Valve Operation
The AOD does not use engine vacuum and a modulator valve to sense load. Instead, a throttle valve is used which moves proportional to throttle pedal travel. Unlike a kick-down rod, the TV linkage has to operate throughout the full travel. This is one of the most important parts of the swap to get right. Failure to do so will cause poor shift quality and can quickly ruin the transmission. When adjusting the linkage, it is safer to err on the side of hard shifts. There are a several ways of implementing the TV linkage and the linkages can be pirated from cars or trucks that came with AOD’s and carbs or throttle body injection. A rod arrangement was used on AOD cars equipped with a carb or TBI, while a cable was used on SEFI cars.
Hydraulic Fittings
The hydraulic fittings on our AOD were larger than those of the previous C4. After the existing lines were trimmed to their proper length, two adapter fittings (1/4″ (ID) pipe, 5/16″ (OD) tubing) were used to mate the fittings on the transmission lines to the AOD case. I believe the lines on our car were not original since they looked like new and had quite a bit of excess length. They were also harder than any factory line I’ve dealt with. Even though we used the proper tubing benders and double flair tools, the lines were very hard to work with.
Dipstick Tube
With a minor bending of the attachment bracket, the AOD dipstick tube went in easily. The AOD tube proved to be shorter than the C4 tube and ended up in close proximity to the export brace, so a long neck funnel was required to fill the transmission. This will vary from car to car.
Drain Plugs
One thing to install a drain plug kit when I had the pan off.
Transmission Fluid
AOD’s take a lot of Dexron-II transmission fluid (the C4 used type F). The Chilton’s we checked for capacities quoted 24 pints (12 quarts) for a totally dry transmission like ours.
Shift Kits and Transmission Coolers
This particular car is not subjected to much abuse so we didn’t install a shift kit or auxiliary transmission cooler. To begin with, we’ll simply adjust the TV linkage to give firmer shifts and see how it works out.
While there are lots of little details (and a couple major ones), this is definitely a do-able swap
Ford 302, 347 stroker, 427w stroker, Coyote and Godzilla Crate Engines. Classic Mustangs and Muscle Cars, Cobra Replicas, Hot Rods, Trucks and broncos. Daily driven, Street Performance and Street / Strip Engines Customized to your vehicle. Top Brand Parts & machining, 30+ years in business available Ready to Run out of the box. Visit Now; www.mustangengines.com